

How To Change Parking Light On 2011 Camry
Toyota Camry Headlight Bulbs Replacement Guide
How to replace the low axle, loftier beam & plow signal light bulbs in the headlight assembly of a 07-11 Toyota Camry.
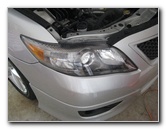
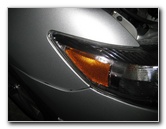
Toyota Camry Headlight
Turn Signal, Low, High
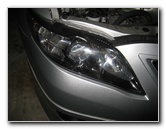
Depression Beam Bulb - Middle
Owners of other Toyota, Lexus or Scion vehicles such equally the Corolla, Matrix, Yaris, Avalon, Venza, RAV4, FJ Cruiser, Highlander, 4Runner, Sequoia, Country Cruiser, Tacoma, Sienna, IS 250, IS 350, ES 350, GS 350, LS 460, tC, xB, xD, iQ and the Toyota Aurion (Australia) may also find guide to be helpful.
Replacement bulbs with their corresponding function numbers are equally follows: Low Beam # H11, High Beam # 9005, Turn Betoken # 7440A (or 992), and front side marker (parking calorie-free) # 2825.No tools are needed to replace the low beam or loftier axle bulbs. A small flathead screwdriver is required to admission the front plow bespeak and side marker light bulbs.
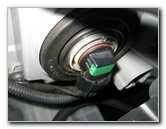
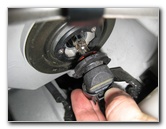
Low Beam Bulb Base
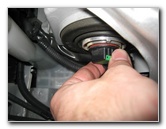
ane/4 Turn Counter Clockwise

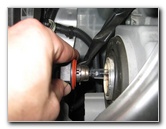
Remove Low Beam Bulb
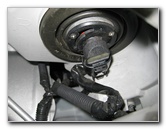
To replace it, open the hood and locate the black/green light seedling base of operations on the rear of the assembly.

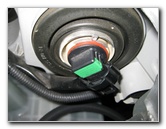
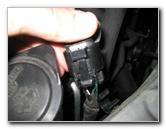
Push Down Release Tab
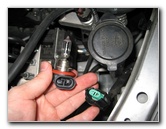
Power Connector Removed
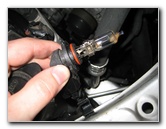
Philips H11 LL 12V 55W
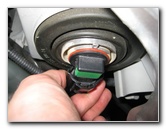
Button down on the black plastic release tab on the ability connector and separate it from the base of the bulb.
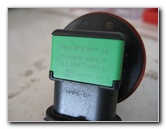
New Bulb Attach Power
Insert Low Beam In Headlight
Low Axle H11 Installed
If you do touch the bulb, wipe it off with a paper towel moistened with rubbing alcohol.
Grease or clay on a halogen headlight bulb may cause information technology to overheat and shorten its life.
Push the ability connector onto the base of the new H11 low beam seedling, carefully insert the bulb into the headlight assembly, and rotate it 1/4 turn clockwise to lock it in place.
1/iv Turn Clockwise - Lock
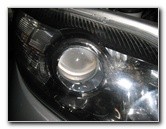
High Beam - Inner Corner

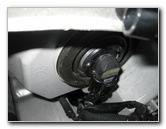
Loftier Beam Bulb Base
The OEM Sylvania 9005 loftier beam bulb has an all black plastic base.
Turn the base of the high beam bulb one/4 plough counter clockwise to unlock it and and so pull information technology straight out of the headlight assembly.

1/iv Turn Counter Clockwise
Loftier Beam Bulb Removed
Button Tab Down & Pull
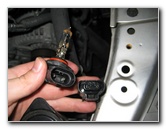
Power Wire Disconnected

Sylvania 9005 12V 60W
Install New Loftier Beam
If you do get some grease, oil or clay on the seedling, make clean it with an alcohol moistened paper towel or tissue.
Button the power connector on to the base of the new loftier beam bulb until it snaps into place.
Insert the bulb into the headlight assembly by lining upward the black plastic notches.
Rotate the base of the new high beam seedling 1/4 turn clockwise to lock it into place.
Line Upwards Notches
1/4 Turn Clockwise Secure
Sidemarker & Turn Signal
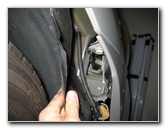
To access the bulbs requires pulling back the black plastic wheel well liner which is much easier to do with the front wheel out of the way.
Turn the steering wheel all the way to the left if y'all are replacing the bulbs on the passenger side.
Turn the steering bike all the way to the correct if yous are replacing bulbs on the commuter side.
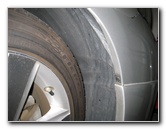
Turn Front Wheels
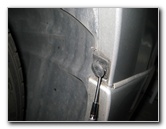
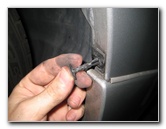
Wheel Well Liner Fastener
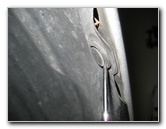
Pry Out With Screwdriver
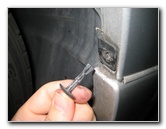
Utilize a small flathead screwdriver to pry out the small round eye part of each fastener.
Remove 2nd Pop Rivet
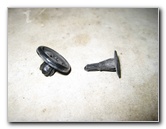
Plastic Pop Rivet Removed
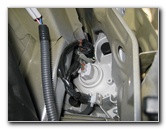
Pull Back Wheel Well Liner
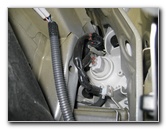
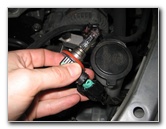
Turn Indicate & Sidemarker
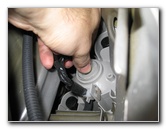
1/4 Turn Counter Clockwise
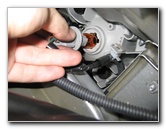
Plow Signal Seedling Socket
Rotate the turn signal seedling'south socket 1/4 plow counter clockwise and pull it straight out of the headlight assembly.
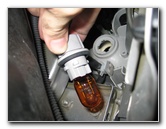
Pull the old 7440A (or 992) calorie-free seedling straight out of the socket.
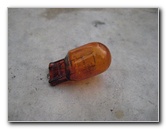
7440A (992) Light Bulb
Insert New Bulb In Headlight
1/4 Plow Clockwise
To replace the front side marker light bulb, rotate the smaller blackness base one/iv turn counter clockwise, pull the socket out of the headlight, pull out the onetime # 2825 calorie-free seedling, push button in a new # 2825 bulb, insert it into the headlight assembly and rotate it ane/four turn clockwise to secure it in identify.
Replace Liner Retainers
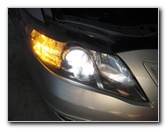
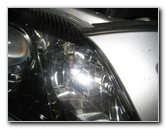
Testing Bespeak & Low Beam
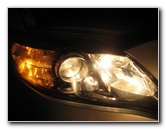
Testing Loftier Axle Bulb
Push the bike well liner back into place and re-insert the blackness plastic fasteners.
Test the new bulbs by turning on the headlights, activating the chance signals and flashing the high beams.
For more, check out my Toyota Camry Repair & Maintenance Guides folio.

Source: https://www.paulstravelpictures.com/Toyota-Camry-Headlight-Bulbs-Replacement-Guide/
Posted by: outlawdocke1945.blogspot.com
0 Response to "How To Change Parking Light On 2011 Camry"
Post a Comment